Field Guide
Create your first site report
From sign-in to a finished report in your inbox: eleven steps that take about ten minutes on your first visit, and about two on every visit after.
ArchitAI Field + Cloud
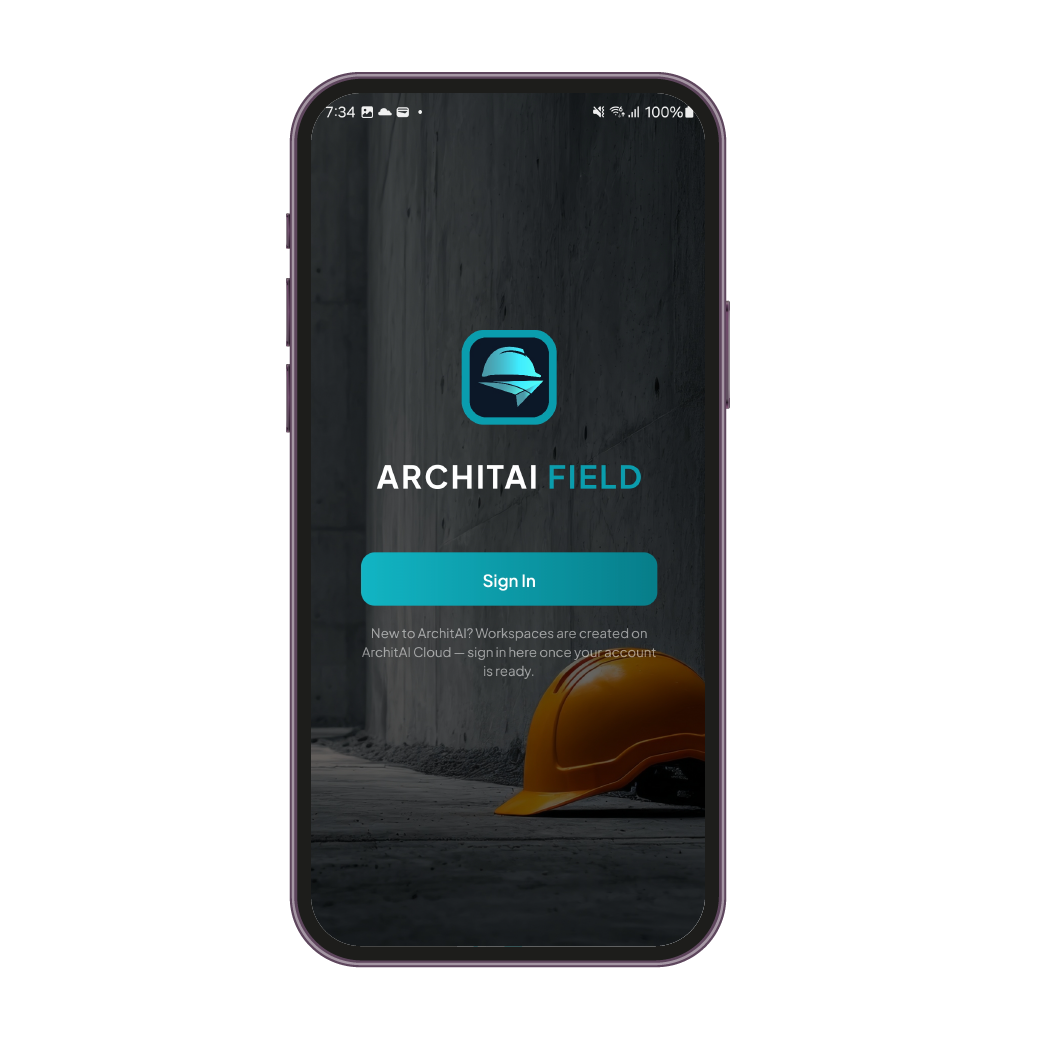
Get StartedSign in
Sign in with the same account you created on ArchitAI Cloud. One account works across Field and Cloud.
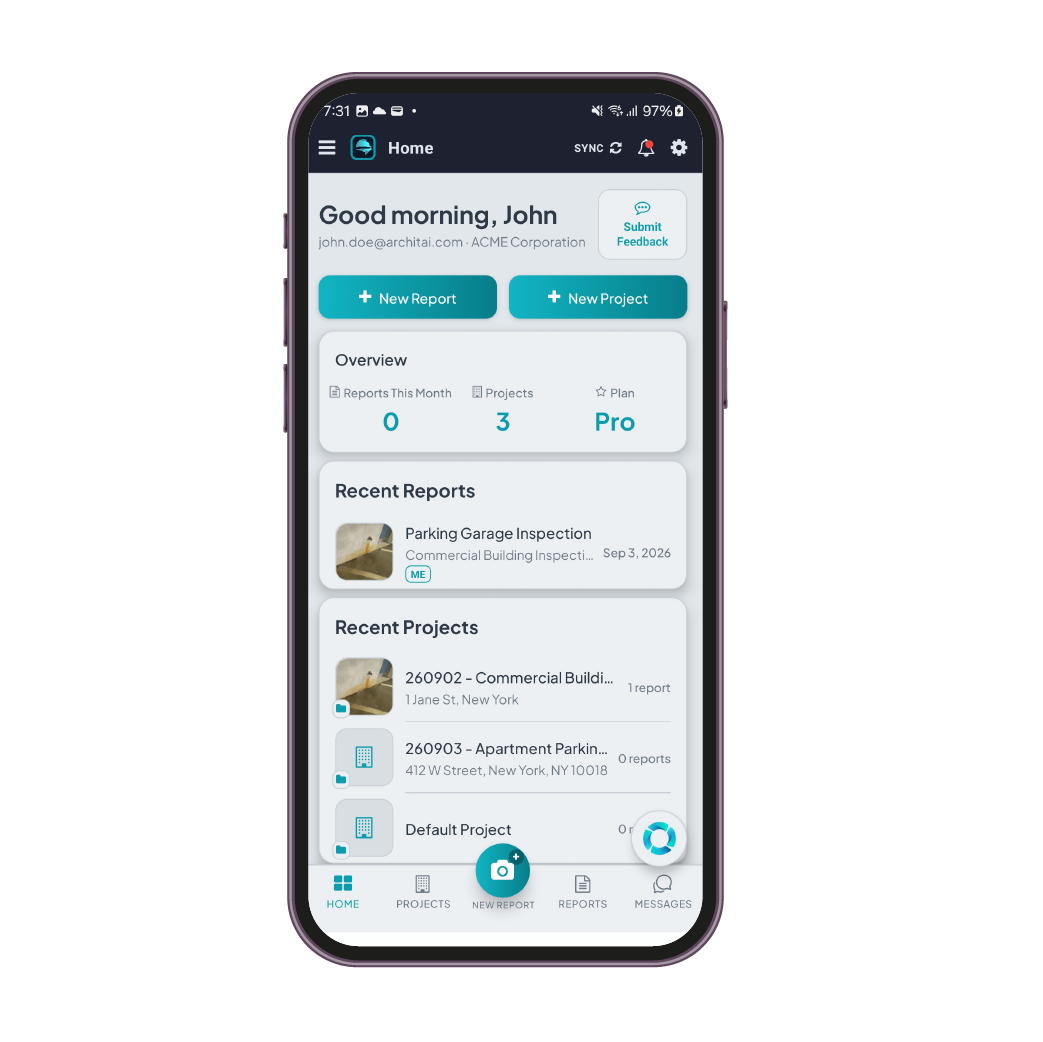
Create a project
In the dashboard, tap New Project. A project is simply a folder: it holds all the field reports for one job site.
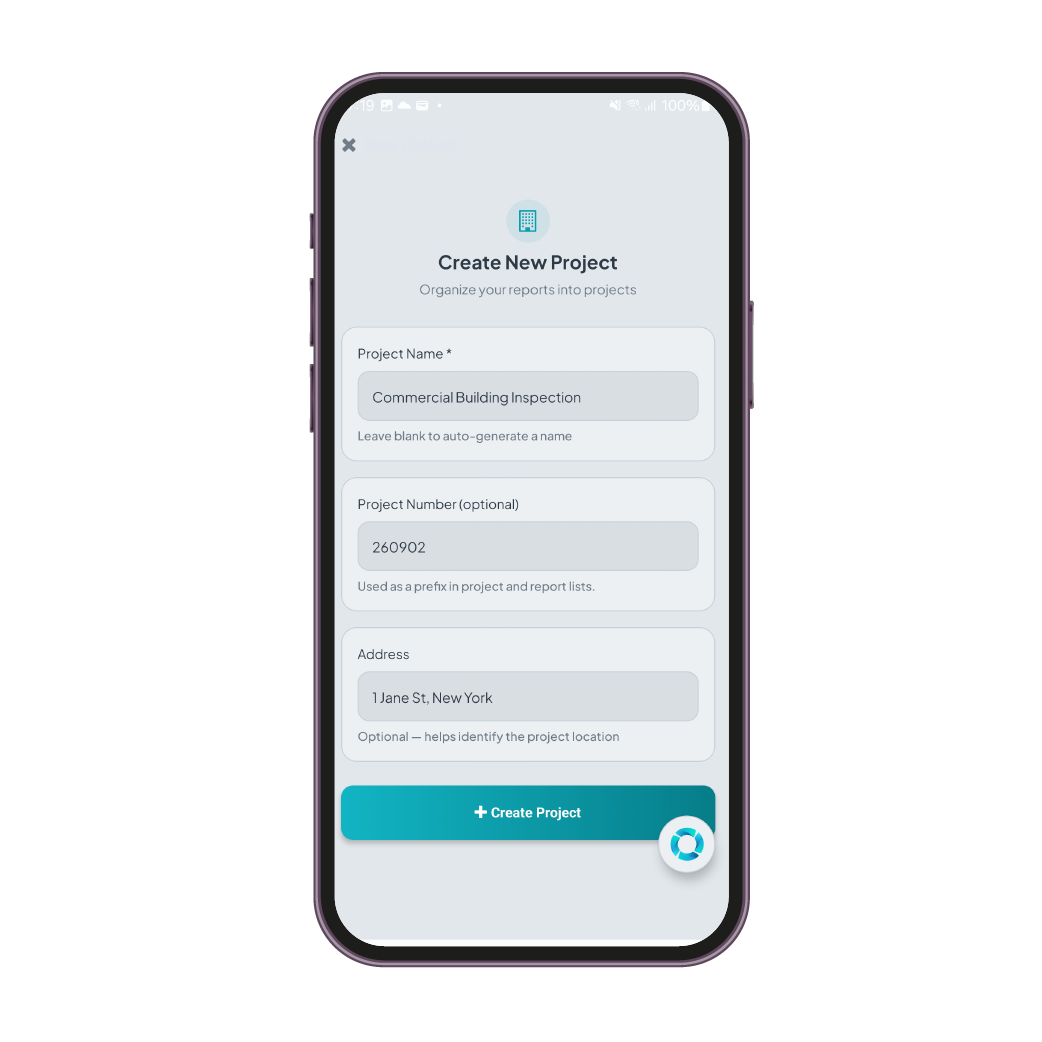
Enter the project details
Give the project a name, a number and the site address, then tap Create Project.
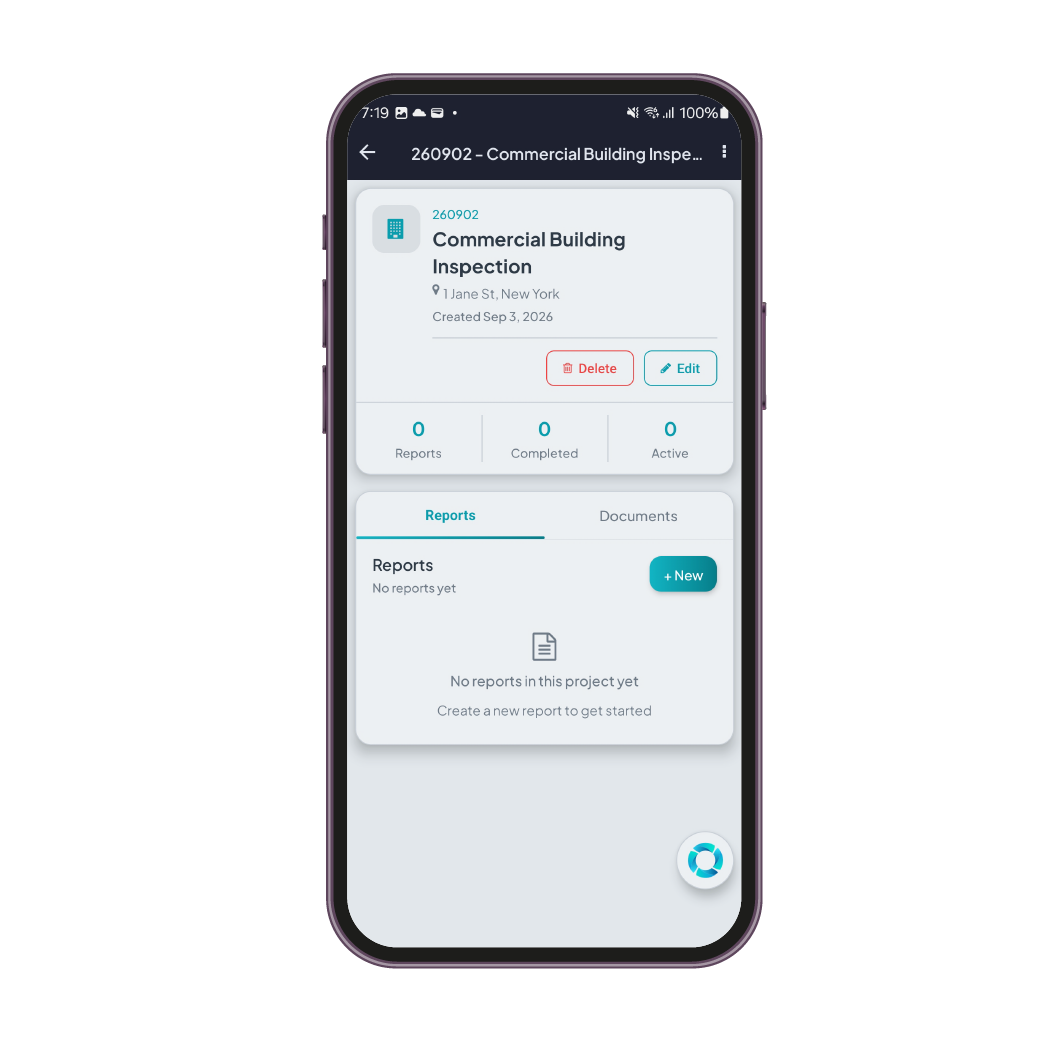
Open the project and start a report
With the project open, tap New in the Reports tab. Every report you create from here files itself into this project.
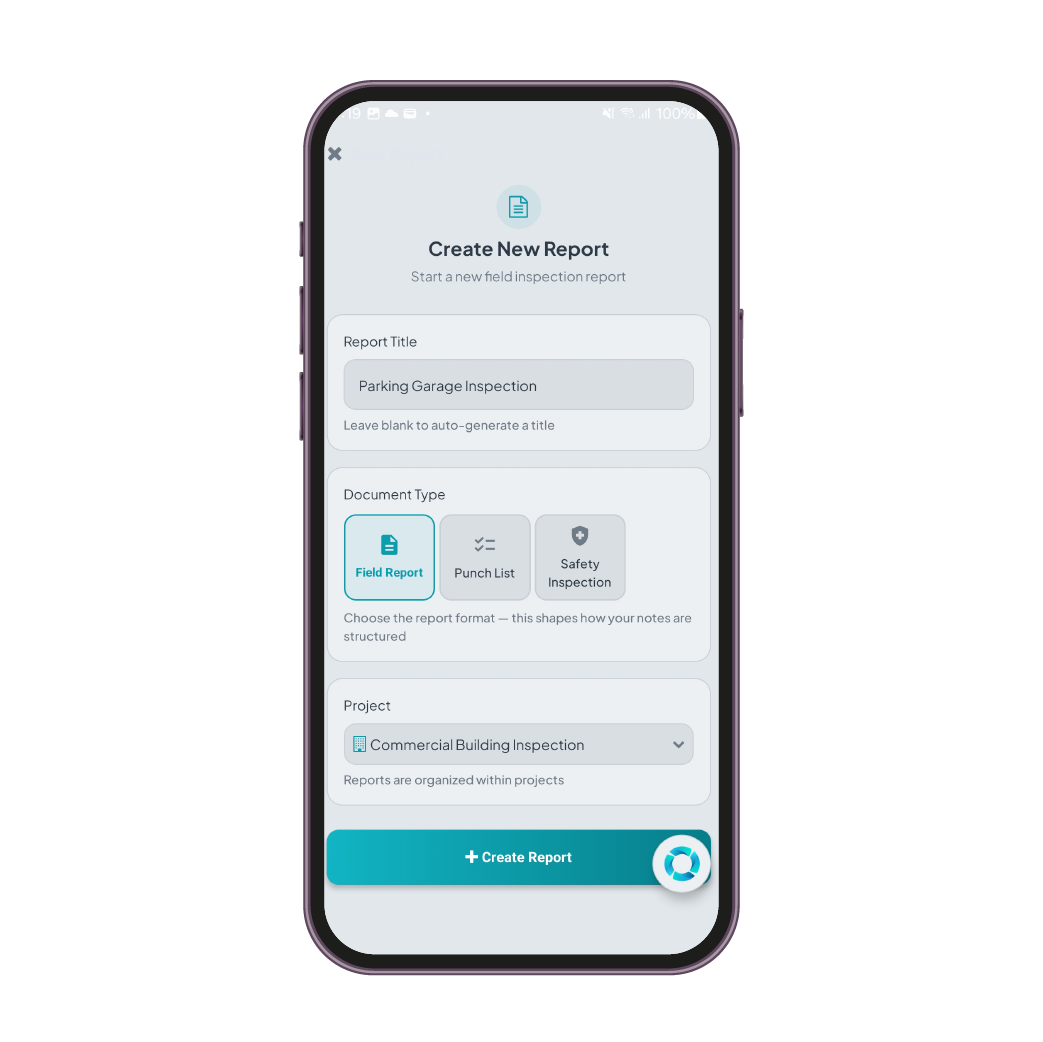
Name it and pick a template
Enter the report information, it can match the project, and choose the format: a standard field report, a punch list or a safety inspection. The template shapes how your notes are structured.
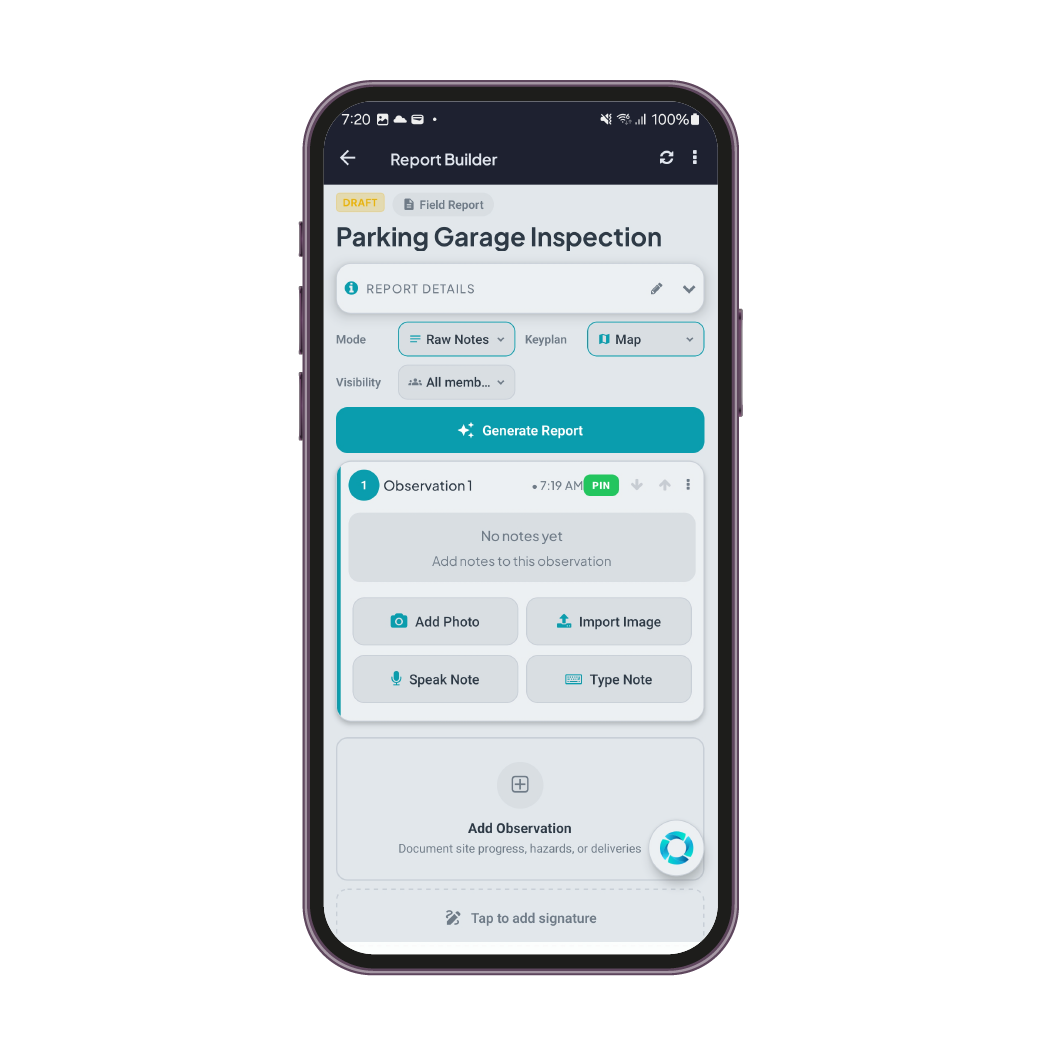
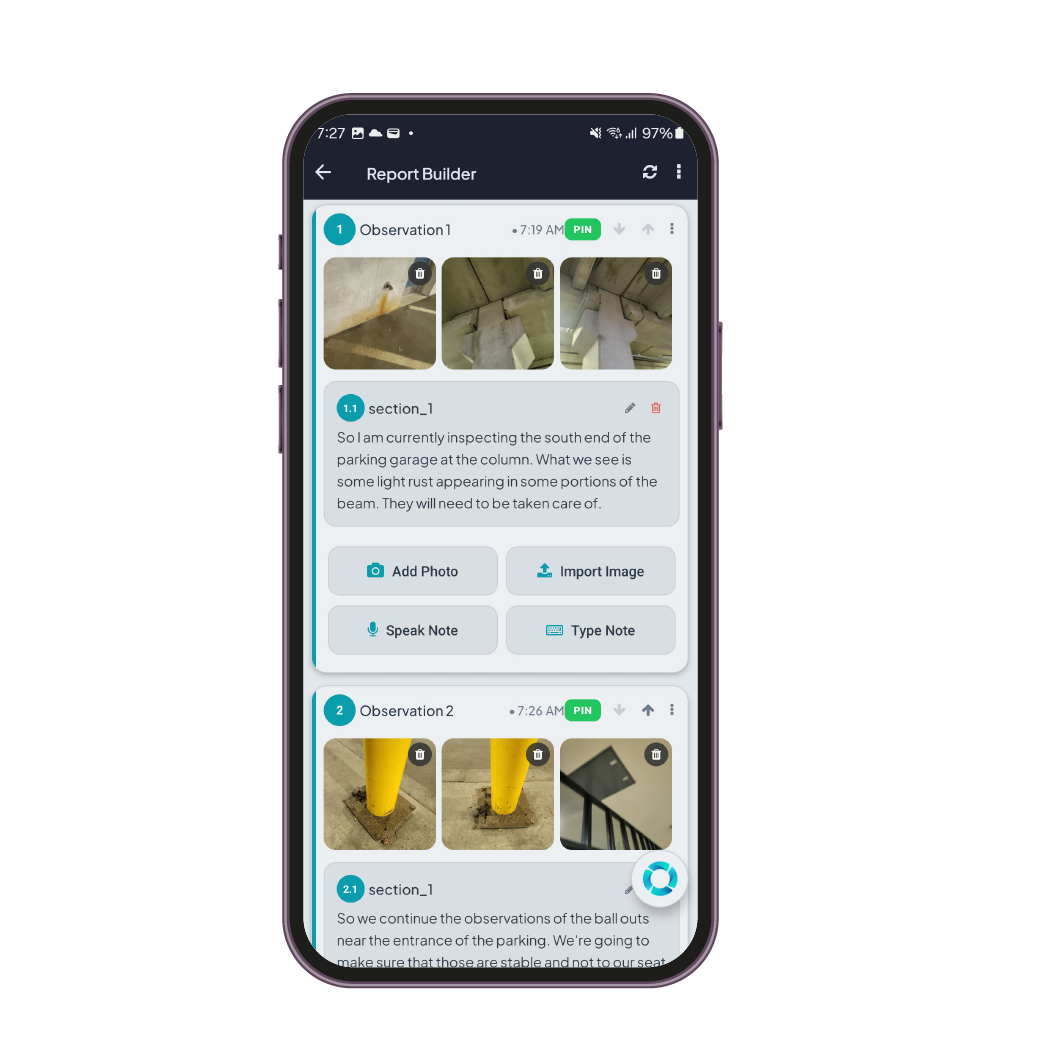
Meet the observation card
Each section of the report is basically a paragraph. Add as many photos as you want to a section, they stay with that paragraph in the final report.
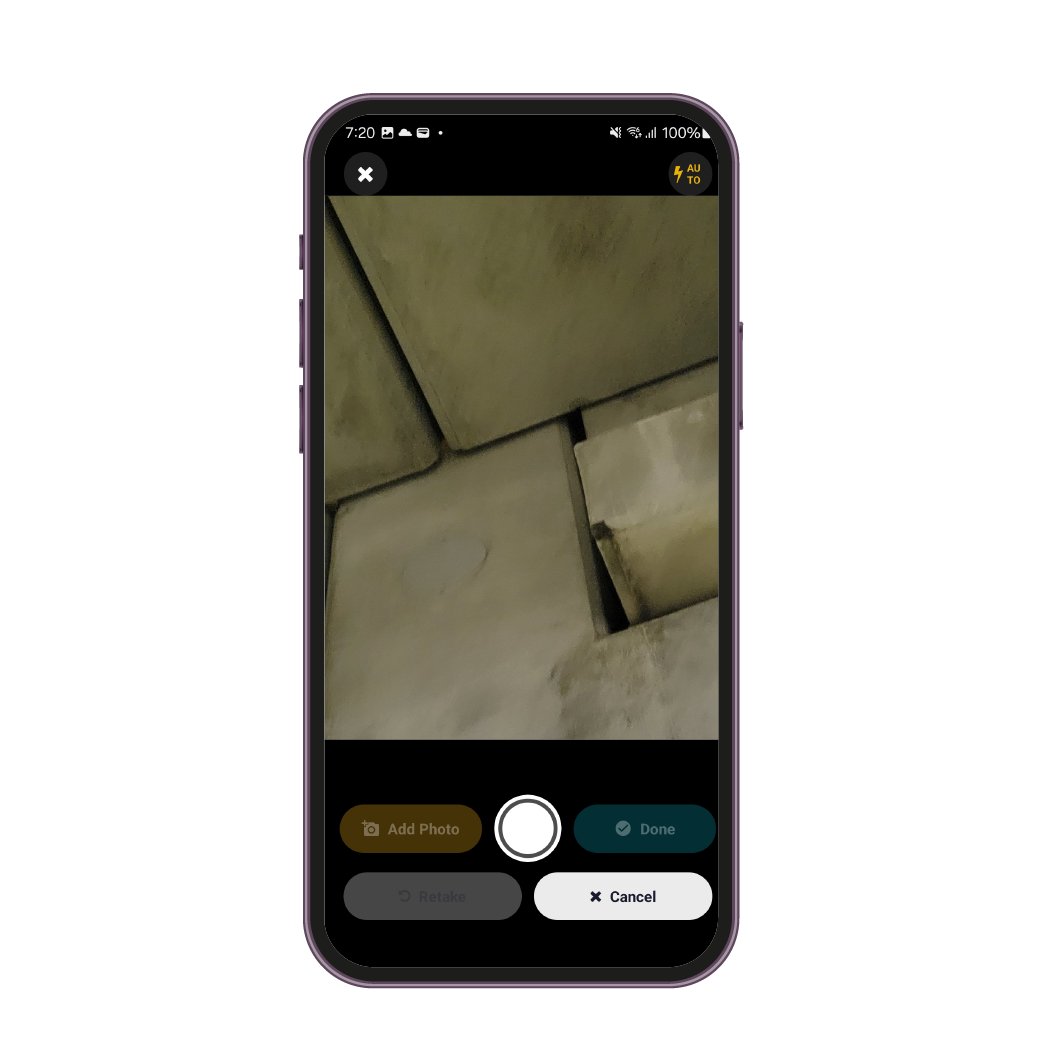
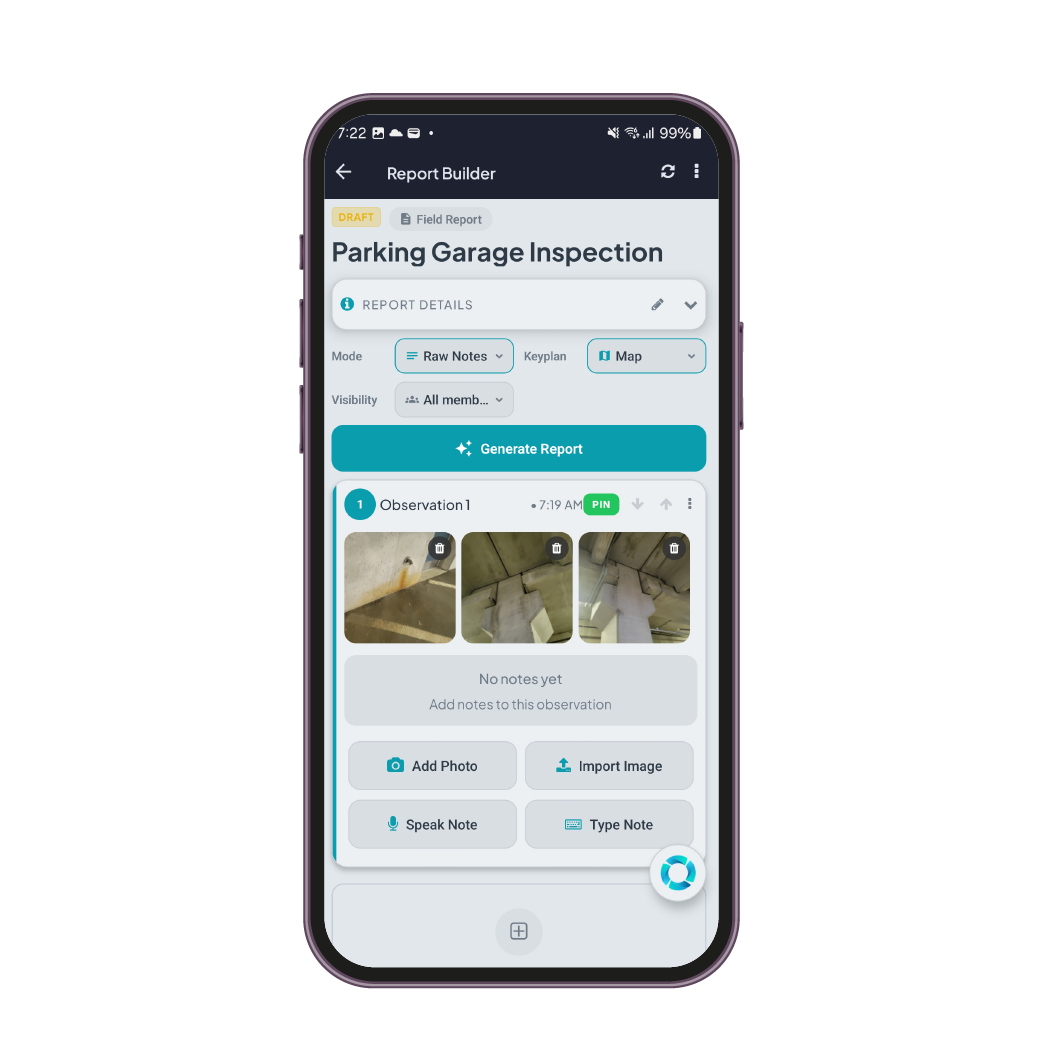
Capture the photos
Tap Add Photo and the camera opens. Tap Add Photo again inside the camera to capture several shots in a row; Done attaches them all to the section.
Speak your observations
Tap Speak Note and talk. Your words are transcribed instantly into the section, in order, next to the photos they belong to.
Add a section per finding
Repeat for every observation as you walk the site: new section, photos, a spoken note. Each finding stays grouped with its own evidence.
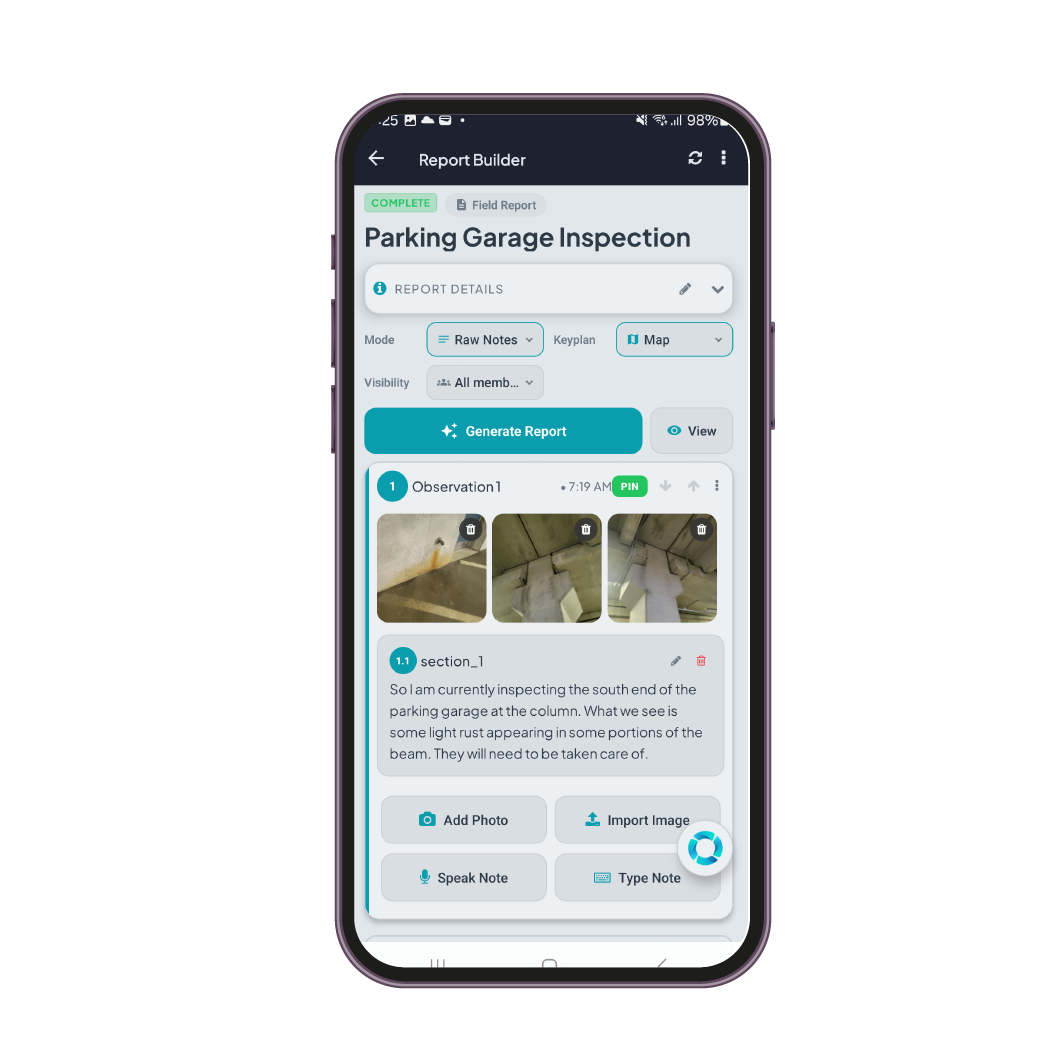
Generate the report
When all sections are added, tap Generate Report. Your raw notes and photos become professional report language, and the draft stays fully editable.
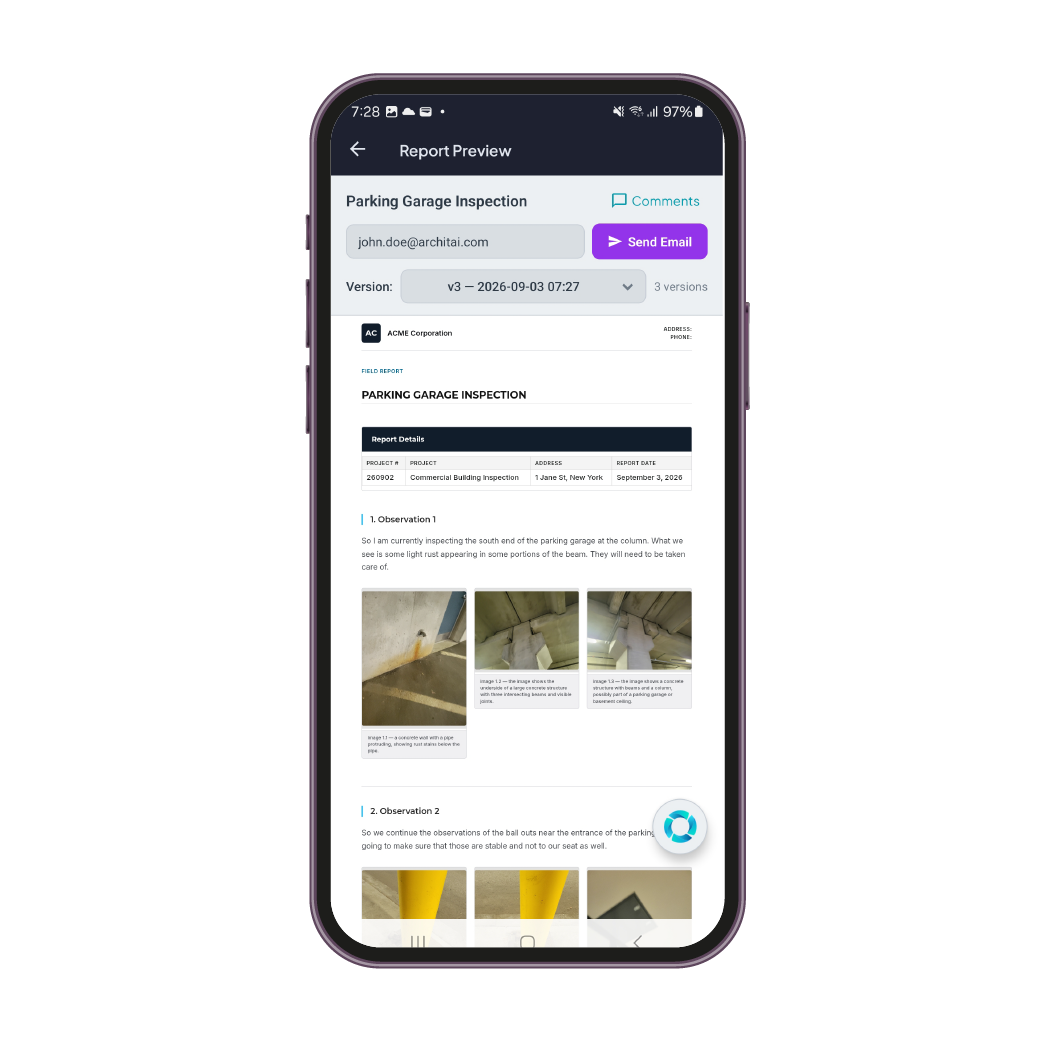
Email it to your inbox
Open the preview and tap Send Email. The finished, branded report lands in your inbox before you leave the site, and it is already synced to your team's Cloud workspace.
Your next site visit could write itself
Create your account and turn your phone into a professional-grade field reporting tool. Free for 14 days.